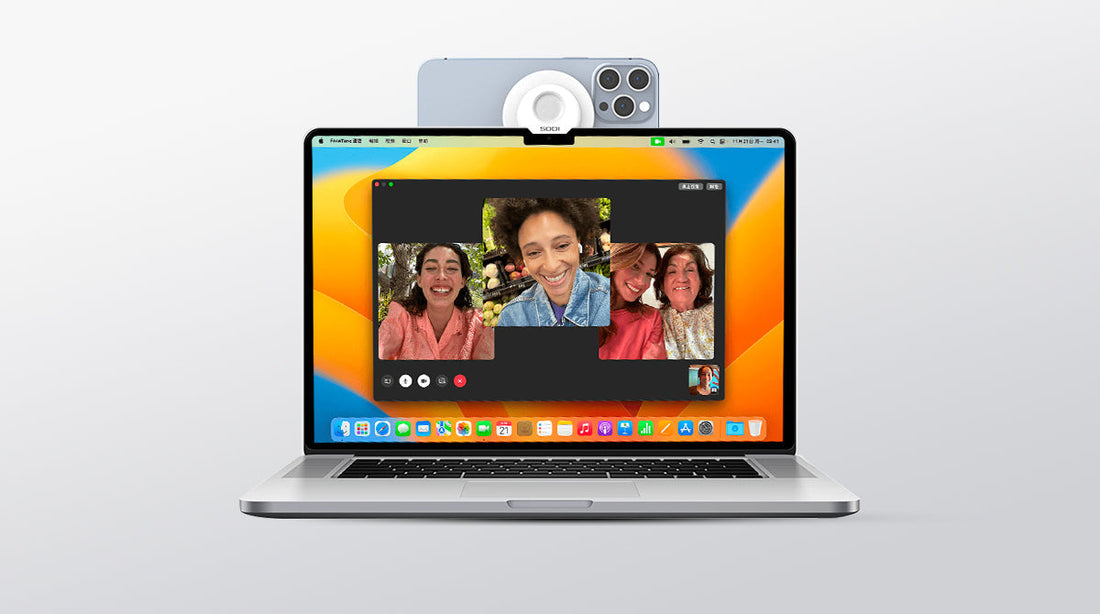
The following content will include:
- How to connect
- Reasons for connecting
- Effective methods to fix iPhone on Macbook or iMac
1. How to connect
Before connecting, please confirm that your device meets the system requirements:
iOS: iOS 16 or later; iPhone XR or all iPhone models launched in 2018 or later.
macOS: macOS Ventura or later; any Mac compatible with macOS Ventura or later.
Step 1: Fix iPhone
Choose a fixed point on the Macbook or iMac and fix the iPhone on it with a compatible Continuity Stand.
The iPhone needs to be in landscape mode with the rear camera facing you, and then check that the camera is not blocked by other objects.
Place the device firmly and start the next step of connection.
The Continuity Camera function supports wired or wireless use. If you need to use it while charging, embed the Continuity Stand into the MagSafe charger, or connect the iPhone's charging cable to the Mac or USB charger. If the iPhone battery is low, the Mac will send a notification to remind you.
Step 2: Choose your iPhone camera
Open FaceTime or another app that you want to use with the iPhone camera. If the app doesn't automatically start using your iPhone camera, choose your iPhone camera from the app's video menu, camera menu, or other settings. For example, in a FaceTime call, choose your iPhone camera from the Video menu.
Step 3: Choose your iPhone microphone
You don't need to choose your iPhone microphone unless your Mac doesn't have a built-in or external microphone. In that case, your app may automatically choose your iPhone microphone. Your iPhone microphone is available separately to apps that support microphone settings, or you can choose the menu in the upper-left corner of your Mac > System Settings, click Sound in the sidebar, and then select your iPhone microphone in the Input tab.
Step 4: Start exploring Continuity features
Explore features like Response, Speaker Front, Desktop View with Wide Angle Lens, Manual Framing Adjustment, and more.
Visit Apple Support if you have connection issues.
2. Reasons for connecting
Through the above connection methods, you can see a clearer picture on your Mac, which benefits not only you but also your friends who are participating in the video conference. If you are a blogger of education, games, etc., you can definitely feel the benefits of this function when live streaming and recording videos.
The iPhone's rear main camera can reach up to 48 million pixels and is equipped with a large aperture of f/1.78. At the same time, there is a 12-megapixel telephoto camera that supports two times optical zoom and a 48-megapixel ultra-wide-angle camera. It is said that all rear cameras of Apple's iPhone 17 Pro Max will be 48 million pixels.
Currently, the cameras used by MacBook and iMac M1- M3 are 1080p, about 2 million pixels. This will be a 24X gap with the iPhone.
Camera pixel comparison between Macbook Air, Macbook Pro, iMac and iPhone15 Pro:
|
Device |
Camera Type |
Resolution |
|
MacBook Air (M3, 2024) |
Front Camera |
1080p (2MP) |
|
MacBook Pro (M3, 2024) |
Front Camera |
1080p (2MP) |
|
MacBook Air (M2, M1, 2020) |
Front Camera |
1080p (2MP) |
|
MacBook Pro (M2, M1, 2020) |
Front Camera |
1080p (2MP) |
|
iMac (M3, 2024) |
Front Camera |
1080p (2MP) |
|
iMac (M1, 2021) |
Front Camera |
1080p (2MP) |
|
iPhone 15 Pro |
Rear Main Camera |
48 MP |
|
Rear Ultra-Wide Camera |
12 MP |
|
|
Rear Telephoto Camera |
12 MP |
MacBook cameras are not as powerful as iPhone cameras. If you use iPhone as a camera, you can experience the advanced features of iPhone cameras on Macbook, such as background blur, centering people, and face lightening.
3. Effective methods to fix iPhone on Macbook or iMac
The iPhone and Mac cannot automatically achieve the magnetic attraction effect. We need a bracket to fix the iPhone on the Macbook or iMac without damaging the computer's camera and screen, and also to ensure that the iPhone does not shake.
SODI BM330 Continuity Camera Mount can meet the above needs. This bracket has won the 2024 German Red Dot Award. It not only has a stylish appearance, but also practical functions.
- As a continuous interoperability bracket for Macbook and iPhone
- Can be used as a continuous interoperability bracket for iMac and iPhone.
Supports multi-angle adjustment, and enables desktop presentations using a wide-angle lens, so that the speaker and the desktop speech can be seen simultaneously.
- Can be used as a mobile phone bracket. Just gently rotate the iPhone to switch between horizontal and vertical screens at will, so that you can watch videos and browse other content while charging.
- Compatible with Magsafe chargers, whether on a computer or as a mobile phone bracket, it can be used while charging.
*SODI BM330 Continuity Camera Mount does not include a Magsafe charger.
Conclusion
Continuity Camera Mount is the best tool for implementing the new continuous camera feature of the latest version of macOS between iPhone iOS and Mac macOS. With this Mount, you can use the new continuous camera feature of the latest version of macOS to transfer the powerful camera function of iPhone to Mac for FaceTime calls, video conferencing, and capturing content.


